

A&A-Scheduler
The A&A-Scheduler application is designed to work with microcontrollers. A task scheduler designed to control Arduino and other microcontroller platforms using Android devices. Communication with the microcontroller is carried out using a USB UART adapter. A&A-Scheduler automatically recognizes USB UART adapter drivers and attempts to send a request to the microcontroller, waiting for a ready response. After receiving the ready signal, the A&A-Scheduler will send the appropriate commands to the microcontroller according to the planned schedule. A&A-Scheduler runs in the background.
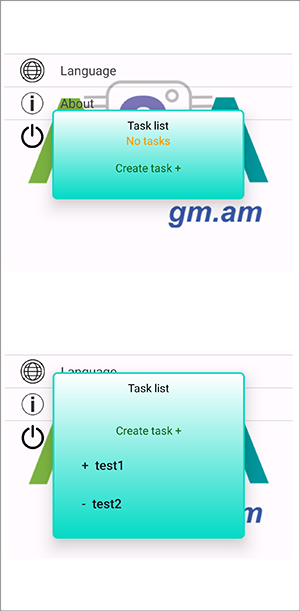
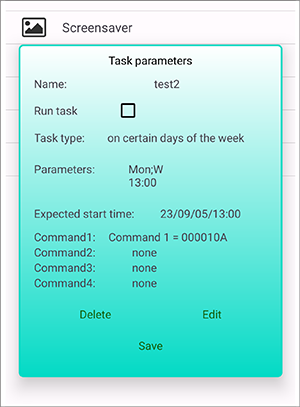
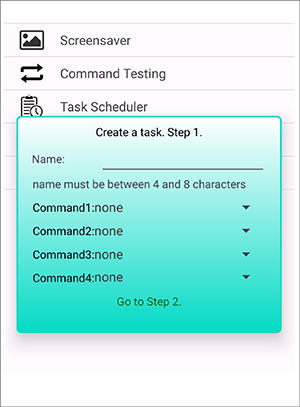
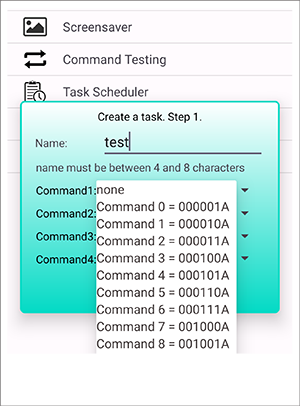
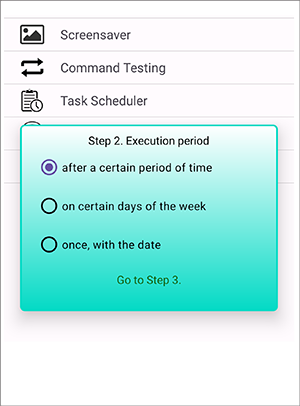
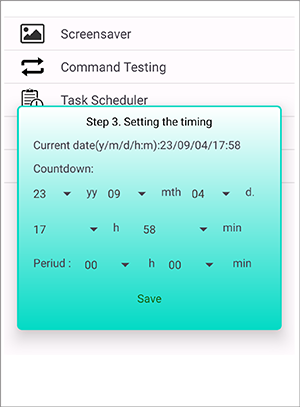
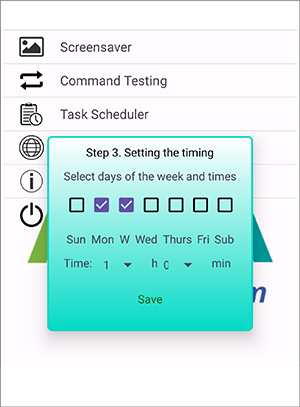
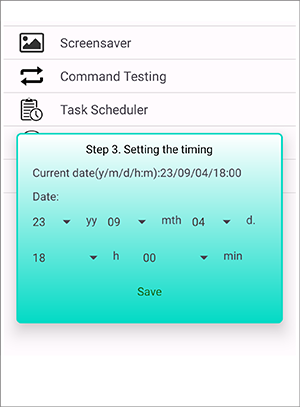
This item opens a window where you can see the list of created tasks and the “Create task +” item. In the list of tasks, before the name of the task, there is a “+” or “-” sign, respectively, which means the task is active (it will be executed in accordance with temporary settings) or disabled (it will not be executed). When you click on a line from the list, the current window will change to a new one, which displays basic information about the task, the ability to activate or disable it, the nearest response time, save the change, delete or edit the task. When you click on “Create Task +”, a new window will appear. Here you need to set the name of the task - from 4 to 8 characters, select at least one command. Commands will be transmitted in turn at the scheduled time with an interval of a few seconds. Then select "Go to Step 2". At this stage, you must select one of the planning types and “go to Step 3”. Here, after setting the time parameters, select “Save”. This completes the creation of the new task. A new task is automatically created inactive. To activate it, you need to call the “Task Scheduler” item again. Find the line with the name of the new task and click. In the window that opens, check the box next to “Run task” and click save.
If the application is running, then it will try to execute commands according to the scheduled active tasks. An application is considered to be running if its message is present in the note line. All open screens can be closed by pressing “Back” or “Home”.